Getting ready for final critique
The critique will begin at 3:06 sharp
If you arrive after that time, your project is late (never fear — this is not the end of the world, but it will result in lowered points for the project grade).
Make the piece look crisp, sharp, and super-neat. It will take MUCH LONGER than you think to prepare and create the mock-up for your Behance page. Build that time into your production, and show up relaxed and ready to go.
Please note, even with the full class time, we may not be able to critique every piece — some work may be discussed in the following class. All work will nevertheless be due before the beginning of next class. Missing the second day of critique (because your work was already discussed) will adversely impact your project grade.
Some Tips…
Before you arrive, prepare something to say. Take a look at your work — really, look at it, what have you achieved? What were your goals? What is working well? What is not working well?
In design, we must contend with the fact that everything you do should have a reason behind it. In other words, at any time, we can ask “why” you chose to do something. The answer should be more than “I don’t know,” or “I thought it looked cool.”
It’s okay for things to “look cool,” but as a designer, this will not carry weight. Think about your work — think about your decisions. WHY might something look cool? If you can answer this, then you are really thinking as a designer.
On a technical note, one thing I will be looking for is how diverse your materials have been — how creative you have been with your materials. There is still time to get more elements, so if necessary — start taking your own pics (or scanning if you have access)!
Finally, be ready to discuss your ideas about composition, scale, eye movement, and dynamic size relationships.
Good luck!
OPTIONAL ONLY: If you would like to print your project
If you want to see what your project looks like printed, you may follow this guide. You may “mount” your work on black board, black foam core, or black poster board.
It is your choice whether you want to leave a “border” of black around the outside edge of your poster, or whether you would like to have the border trimmed off for a flush presentation.
With a border, your work might look like this:

This is your friend:
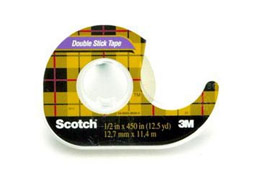
Feel free to “tile” your work, if you like, or have it printed large-scale as discussed at Big Shots (or Kinko’s). Remember to think about paper quality.
If you decide to tile — make the presentation impeccably clean! Trim all “white” margins out; the poster should look perfectly intact (even though it is made from multiple pieces). The board itself should be cut cleanly and not tiles coming unglued.
The mounting board should help you in the tiling process because you can “affix” the pages one-by-one to the board. View project 01 Wrap-Up if you need a refresher on tiling.
